

Table of Contents
- Why Small Kitchen Cabinet Organization Fails
- Step 1: Empty and Declutter Kitchen Cabinets First
- Step 2: Zone Your Cabinet Space by Use
- Step 3: Use Vertical Storage and Cabinet Door Space
- The Best Kitchen Cabinet Organizers for Tight Spots
- Common Mistakes to Avoid When Organizing
- Keep It That Way: Maintenance Routines
- Conclusion
- Frequently Asked Questions
Last Updated: September 7, 2026
Small kitchen cabinets hold more potential than most people realize, but the typical approach to organizing them fails before it starts. The real problem isn't the lack of space; it is the lack of a system. When you simply push items onto shelves without a plan, you lose track of what you own, buy duplicates, and waste minutes every day searching. Learning how to organize small kitchen cabinets effectively starts with changing your mindset from filling space to assigning purpose. This guide from Betterhouse walks through a practical, step-by-step method that turns cramped cabinets into efficient storage zones.
Why Small Kitchen Cabinet Organization Fails
Most organization attempts fail because they treat the symptom, cluttered shelves, rather than the cause, which is a lack of defined zones and poor use of vertical space. You can buy every basket and bin on the market, but if items don't have a designated home, the clutter returns within weeks. Decluttering is only the first step in a process that requires planning your layout around how you actually cook and move in the kitchen.
Another reason efforts stall is that people try to organize everything in one afternoon, leading to decision fatigue and rushed choices. A more durable approach is to work cabinet by cabinet, emptying one section fully before reorganizing it.
Step 1: Empty and Declutter Kitchen Cabinets First
The first step is to remove every single item from your cabinets. This is non-negotiable; you cannot effectively organize small kitchen cabinets if you are working around existing clutter. As you pull items out, sort them into four piles: keep, relocate, donate, and toss. If you have not touched a specialty pan or a novelty mug in over a year, it is a candidate for relocation or donation.
While the cabinets are empty, wipe down all surfaces and assess the cabinet's condition, checking for loose hinges or sticky drawers. A clean, functional cabinet provides the right foundation for everything that follows.
Step 2: Zone Your Cabinet Space by Use
Once you have pared down your collection, assign each cabinet a specific job based on proximity to your work areas. This is the core of small kitchen storage ideas: placing items where you use them reduces wasted motion. For instance, store everyday plates and bowls in the cabinet closest to the dishwasher or drying rack, while keeping pots and pans near the stove. This concept, called zone planning, prevents cross-traffic and makes cooking more intuitive.
Think about frequency of use as you assign zones. Daily items like coffee mugs and cereal bowls should sit at waist level or lower, where they are easy to reach. Occasional items, such as large serving platters or holiday bakeware, can be stored on the highest shelves or in harder-to-reach corners.
Step 3: Use Vertical Storage and Cabinet Door Space
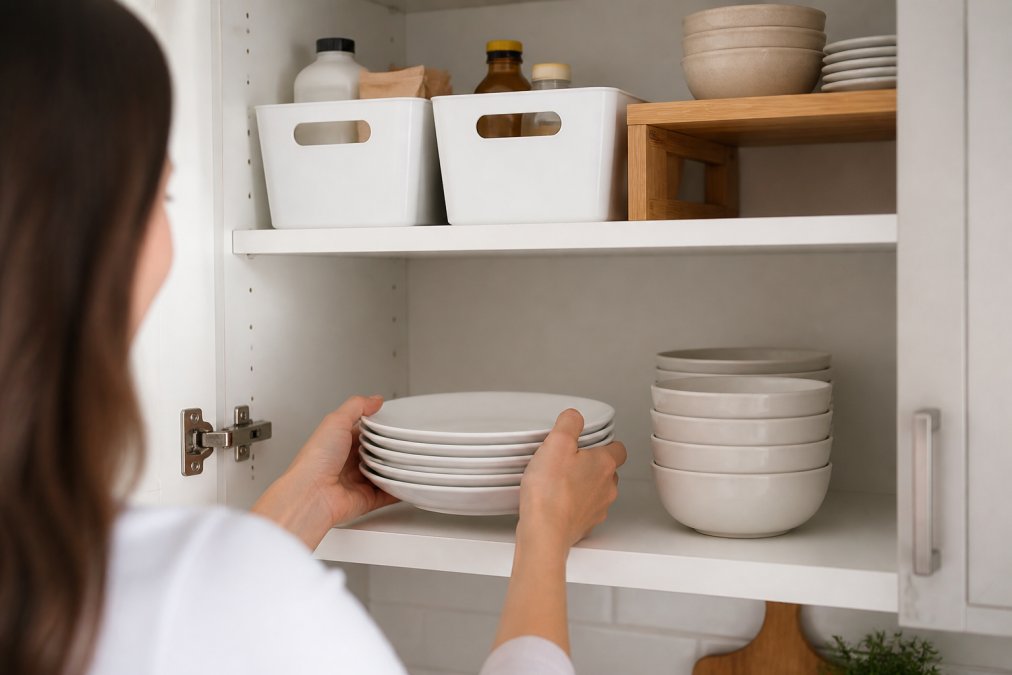
Maximizing vertical storage is the single most effective way to expand a small cabinet's capacity. Most cabinets have significant dead air space above stacked items. Shelf risers and tiered inserts double your usable shelf space by letting you see items in the back row without digging, preventing you from buying a duplicate of something you already own.
Cabinet door space is another underused asset. Door-mounted racks are perfect for storing flat, lightweight items like cutting boards, baking sheets, and foil or wrap boxes. Before installing any door rack, always check the cabinet depth and hinge strength to ensure the door can close properly and support the weight without sagging.
The Best Kitchen Cabinet Organizers for Tight Spots
Choosing the right tools makes the difference between a system that works and one that falls apart. But the best tool isn't always the one with the highest price tag. A strategic approach weighs three options: repurposing what you already own, building simple DIY solutions, and buying store-bought organizers. Each path has trade-offs in cost, durability, and fit.
The Frugal First Pass: Repurpose Household Items
Before spending a dollar, walk through your house for items that can serve double duty.
- Clear plastic takeout containers with lids work as free, see-through bins for grouping like items. Wash them thoroughly and remove any labels. Their uniform rectangular shape stacks efficiently on deep shelves.
- Shoe boxes or shipping boxes covered in contact paper make sturdy, low-profile dividers for deep cabinets. Cut them down to the height you need to create a custom 'drawer' inside a shelf.
- Tension rods are the single most versatile under-$10 item you can own. Install one vertically inside a deep cabinet to create a narrow, upright slot for storing baking sheets and cutting boards on their side. Install one horizontally under the sink to hang spray bottles.
- Magazine holders or file organizers corral cutting boards, sheet pans, and even foil or wrap boxes. Turn them sideways so the contents face out, making each item visible and slide-out accessible.
- Mason jars or cleaned pasta sauce jars are ideal for storing loose items like wooden skewers, straws, or rubber bands. Attach the lids to the underside of a shelf with screws to create a space-saving, upside-down dispenser.
The Middle Path: Simple DIY Builds
For a more permanent solution that still costs less than premium store-bought systems, consider these basic DIY projects. Most require only a drill, screws, and a trip to a hardware store.
- Custom wood shelf risers: Buy a 1x2 pine board and cut it to fit the interior width of your cabinet. Attach small furniture feet or cut additional 1x2 blocks to the desired height. Sand and paint or stain to match your cabinet. This creates a sturdy, custom-height riser for less than $10, versus $15-$25 for a flimsy wire version.
- Door-mounted spice rack from a picture frame: Remove the glass and backing from a deep picture frame, then attach small wooden ledges or use a pre-made spice shelf kit. Mount the frame to the inside of a cabinet door. This creates a contained, shallow storage area that won't interfere with the door's hinge.
- PVC pipe organizer for lids: Cut a 4-inch diameter PVC pipe into 2-inch sections. Sand the edges smooth and glue them together in a honeycomb pattern. Place this block in a deep cabinet to hold pot lids vertically.
When to Buy: The Store-Bought Standard
Store-bought organizers are worth the investment when you need specific features that DIY can't easily replicate: airtight seals, heavy-duty weight capacity, or precise modularity. When you do buy, focus on these proven categories rather than single-purpose gadgets.
| Organizer Type | Best For | Key Consideration | DIY Alternative? |
|---|---|---|---|
| Stackable Wire Baskets | Pantry goods, produce, linens | Measure cabinet height for stacking | Repurposed wire cooling racks |
| Shelf Risers | Spices, canned goods, mugs | Doubles shelf visibility | Custom wood risers (see above) |
| Drawer Dividers | Utensils, cutlery, gadgets | Adjustable widths fit most drawers | Cut-down cardboard boxes |
| Door Racks | Cutting boards, baking sheets | Check hinge strength before mounting | Tension rod + binder clips |
| Clear, Airtight Canisters | Flour, sugar, coffee | Prevents pests and keeps contents fresh | Repurposed glass jars |
A common pattern among professional organizers is to buy a few high-quality, clear, modular bins that fit your exact shelf dimensions, rather than a mismatched collection of decorative baskets. Clear bins let you see contents at a glance, which is essential for inventory management. Before purchasing any organizer, measure your cabinet interiors (height, width, depth) and the size of the items you plan to store. A $30 set of stackable bins that fits perfectly is a better value than a $10 bin that wastes 2 inches of vertical space on every shelf.

Common Mistakes to Avoid When Organizing
A frequent error is buying organizers before measuring your space, which leads to ill-fitting products that waste money and cabinet volume. Another major pitfall is ignoring the "one in, one out" rule. For your organization system to last, you must maintain the balance you created during the decluttering phase.
Many people also overlook the need for accessibility. Storing heavy pots on a high shelf is an ergonomic hazard. Likewise, placing everyday items behind less-used ones creates friction that encourages mess. Finally, resist the urge to over-purchase "pretty" containers. Clear bins are helpful because they let you see contents, but labeling them is what ensures everyone in the household puts things back correctly.
Keep It That Way: Maintenance Routines
The best organization system is worthless if it isn't maintained. The top-ranking guides treat organization as a one-time event, but the real pain point is keeping it that way. A durable system requires two distinct routines: a physical reset to handle daily clutter and a simple inventory management system to prevent overbuying and waste.
The Weekly Five-Minute Reset
Schedule a recurring five-minute block, ideally the same day each week (e.g., Sunday evening). During this reset, do the following in order:
- Return strays: Walk the kitchen and place any item that is not in its designated zone back to its home.
- Front-and-center check: In each cabinet, pull the items from the back to the front. This prevents the 'out of sight, out of mind' problem that leads to buying duplicates.
- Wipe one hot spot: Choose the single messiest shelf (often the spice cabinet or under-sink area) and give it a quick wipe-down with a damp cloth. Rotate which spot you deep-clean each week.
The Monthly 15-Minute Audit
Once a month, perform a slightly deeper audit. Set a timer for 15 minutes and focus on one cabinet or drawer. Empty it, wipe the interior, and assess each item against two questions: 'Have I used this in the last 90 days?' and 'Is this in the right zone?' If the answer to either is no, move it to a donation box or relocate it.
The Inventory Management System: Know What You Have
A simple inventory system is the highest-utility habit you can adopt for a small kitchen. It prevents buying a duplicate jar of paprika and helps you use up what you own before it expires. You don't need a complex app; a basic system works.
The Manual Method (Paper List):
- Keep a single sheet of paper on the inside of a cabinet door (use a binder clip or a piece of tape).
- List the categories you tend to overbuy: spices, canned goods, pasta, rice, condiments, and frozen items.
- When you use the last of an item, immediately add it to the list under the correct category.
- Take this list to the grocery store. When you buy a replacement, cross it off the list.
The Digital Method (Notes App):
- Create a recurring note in your phone's notes app titled 'Kitchen Inventory.'
- Under each category, list the items you have and their approximate quantity.
- Update the note when you finish a container or buy a replacement. This takes 30 seconds.
- For perishables, write the expiration date next to the item. Check this list weekly during your reset to plan meals around what needs to be used first.
The 'One In, One Out' Rule, Enforced:
This rule is often mentioned but rarely enforced. To make it stick, pair it with a physical action. When you bring a new item into the kitchen, immediately place the old or duplicate item into a designated 'donation bin' that lives in your pantry or garage. When the bin is full, take it to a local charity.
The 90-Day Expiration Sweep
Every three months, dedicate 20 minutes to a full expiration-date sweep. Pull everything from your pantry, spice cabinet, and refrigerator door. Check dates on all packaged goods, spices (which lose potency after 1-2 years), and condiments. Discard anything expired or that you know you won't use. Wipe the shelves before returning items.
Adopting these routines transforms organization from a one-time project into a self-sustaining system. The weekly reset takes minutes, the inventory list prevents wasted money on duplicates, and the quarterly sweep keeps your small kitchen safe and functional.
Conclusion
Organizing a small kitchen requires more than just buying bins; it demands a strategic approach that prioritizes accessible zones, vertical space, and honest decluttering. The challenge is maintaining that order against the daily rhythm of cooking and living. Betterhouse supports this effort with a curated selection of durable home essentials, designed to perform reliably without a premium price. Get started with Betterhouse and turn your small kitchen into a model of efficiency.
Frequently Asked Questions
How do you decide where to put things in kitchen cabinets?
Start by grouping items you use together, like baking supplies or daily coffee gear. Put everyday items at eye level or between waist and shoulder height to avoid bending. Store heavy items like cast iron or small appliances on lower shelves where they are safer to lift. Reserve upper cabinets for lightweight, rarely used items like serving platters. This zone planning method is the core of learning how to organize small kitchen cabinets effectively.
What is the best kitchen organizer for a small kitchen?
The best organizers maximize vertical space and use cabinet depth fully. For most small kitchens, stackable metal wire baskets and shelf risers offer the most flexibility because they double shelf space without permanent installation. Clear bins work well for pantry items so you can see what you have at a glance. The best kitchen cabinet organizers for your home depend on your cabinet depth and what you store, so measure before buying.
How do you maximize vertical space in small kitchen cabinets?
Use shelf risers or tiered inserts to create a second level inside each cabinet. Install tension rods under sinks to hang spray bottles or drape cleaning cloths. Add stackable wire baskets for produce or packaged goods to build upward. Magnetic strips on the inside of cabinet doors hold spice tins or knife blocks. These small kitchen storage ideas turn unused air space into functional storage for pots, pans, and pantry staples.
What are 8 easy steps to organize kitchen cabinets?
Start by emptying every cabinet completely. Wipe down shelves and toss expired food or broken items. Group remaining items by category and frequency of use. Measure shelf height and depth before buying organizers. Install dividers, risers, or baskets to fit your measurements. Place heavy items low and daily-use items at waist height. Label bins if you share the kitchen. Finally, maintain the system by returning items to their zones after each use.